Ridge Vent: Installation, Benefits & More

Written By: GreenTek Roofing & Solar | 8 Min Read

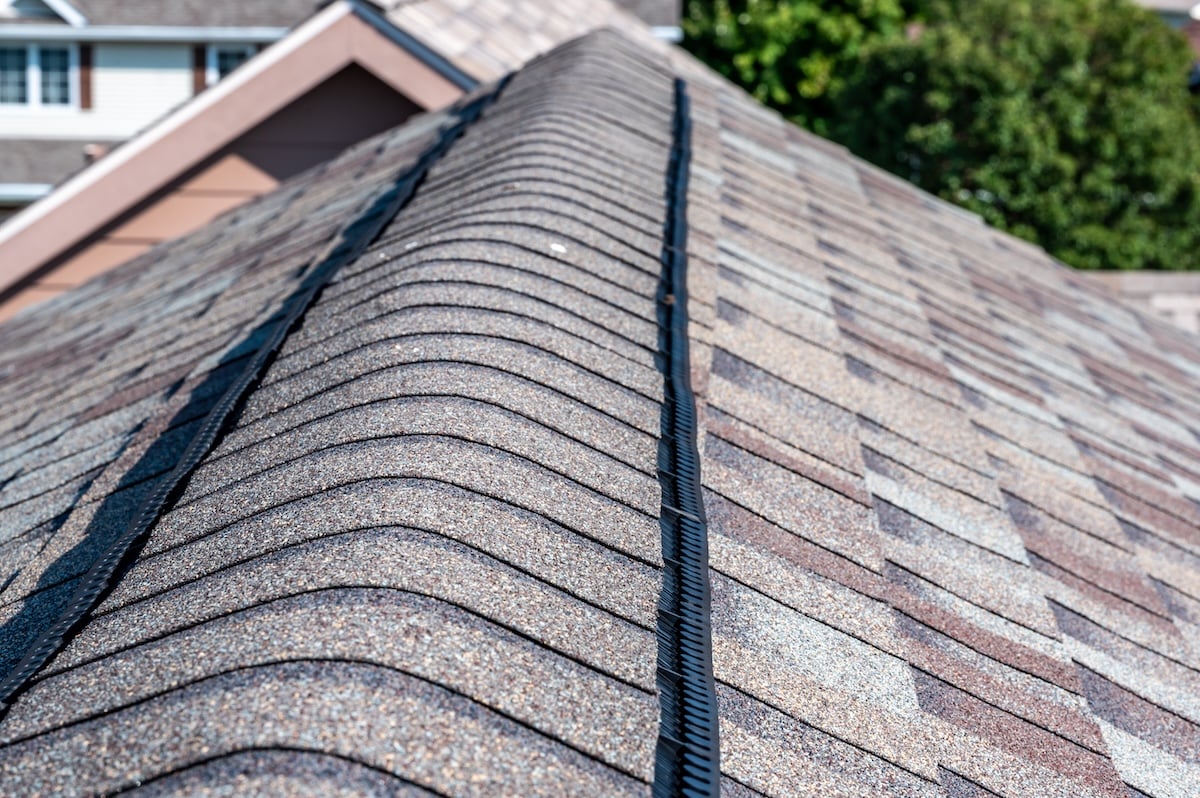
A ridge vent is one of the most effective ways to keep your home properly ventilated and protect your roof from moisture damage. This continuous ventilation system runs along the peak of your roof, allowing hot air to escape naturally while drawing in cooler air through soffit vents below.
In this comprehensive guide, we’ll cover everything you need to know about ridge vents, including:
- What ridge vents are and how they work
- Step-by-step installation process
- Maintenance tips to keep your system running smoothly
🤔 What Is a Ridge Vent?

A ridge vent is a continuous ventilation system installed along the peak (ridge) of your roof. It creates a pathway for hot, humid air to escape from your attic while working with intake vents to promote proper airflow throughout your home.
Ridge vents operate on a simple principle called the stack effect. Hot air naturally rises to the highest point of your attic and exits through the ridge vent opening. This creates negative pressure that draws cooler air in through soffit vents or other intake points lower on your roof.
This continuous air circulation helps regulate temperature and moisture levels in your attic space, protecting your roof structure and improving your home’s overall energy efficiency.
Benefits of Installing a Ridge Vent
Installing a ridge vent system offers numerous advantages for your home and your wallet. Here are the key benefits you can expect:
- Improves energy efficiency by reducing the workload on your HVAC system, saving on energy bills during hot summers.
- Prevents moisture buildup, protecting against mold, wood rot, and insulation damage.
- Extends roof life by preventing excessive heat and moisture damage to shingles and materials.
- Reduces the risk of ice dams by maintaining consistent attic temperatures during rare freezing conditions.
- Provides uniform ventilation, ensuring consistent airflow and better temperature and moisture control.
✅ 8 Steps to Install a Ridge Vent
Installing a ridge vent requires careful planning and attention to detail. While this is typically a job for experienced roofing professionals, understanding the process can help you make informed decisions about your project.
1. Plan Your Installation
Start by measuring the length of your roof’s ridge line to determine the exact amount of ridge vent material you’ll need. It’s important to be precise to avoid any gaps or shortages. Next, check your local building codes and regulations, as these can influence how you install the ridge vent. For example, certain regions may require specific venting sizes or materials to handle local weather conditions. When planning the installation, be sure to leave small gaps at the ends of the ridge. These gaps help prevent wind-driven rain from entering the vent while still allowing airflow. Proper planning at this stage ensures a smoother installation process.
2. Gather Your Tools and Materials
Before starting, collect everything you’ll need for the job. Essential materials include ridge vent material, ridge cap shingles, and roofing nails. For tools, you’ll need a circular saw, measuring tape, a chalk line for marking, and safety equipment such as gloves, safety goggles, and sturdy boots. Since you’ll be working at a height, proper fall protection gear is critical—this may include a safety harness, anchor points, and a sturdy ladder. Having all your tools and materials ready beforehand will minimize interruptions during the installation process and make your work more efficient and safe.
3. Cut the Ridge Opening
Use your chalk line to mark a straight guide along the ridge line where the vent opening will be cut. The width of the slot is typically 1-2 inches, but always check the specifications provided by the ridge vent manufacturer. Once marked, carefully use a circular saw to make the cuts along both sides of the ridge. Be mindful not to cut through the ridge beam or any structural components, as this could weaken the roof’s integrity. Take your time and cut evenly to ensure a clean opening that fits the ridge vent perfectly. This step is crucial for proper ventilation and structural safety.
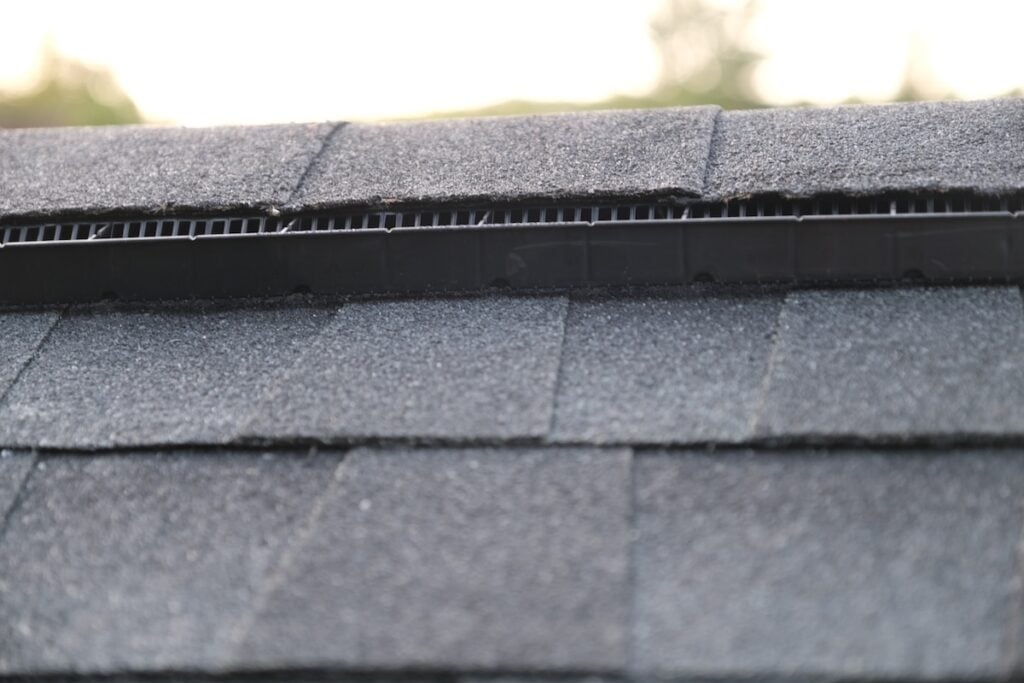
4. Install the Ridge Vent
Position the ridge vent over the newly cut opening, ensuring it’s properly centered and aligned along the ridge line. The vent should extend slightly beyond the cut opening on both sides to provide maximum protection against water infiltration. Many ridge vents come with alignment markers or guides to help you position them correctly, so be sure to follow the manufacturer’s instructions. Double-check that the vent is straight before securing it, as any misalignment can impact both the aesthetics and functionality of the finished installation.
5. Secure the Vent
Once the ridge vent is in position, attach it to the roof deck using the fasteners recommended by the manufacturer, such as roofing nails or screws. Follow the specified nailing pattern—usually outlined in the vent’s installation guide—to ensure the vent is securely attached and resistant to strong winds or other weather conditions. Make sure the fasteners are driven in evenly and completely, as loose nails or screws can compromise the vent’s effectiveness and durability. Properly securing the vent is essential to maintaining its performance over time.
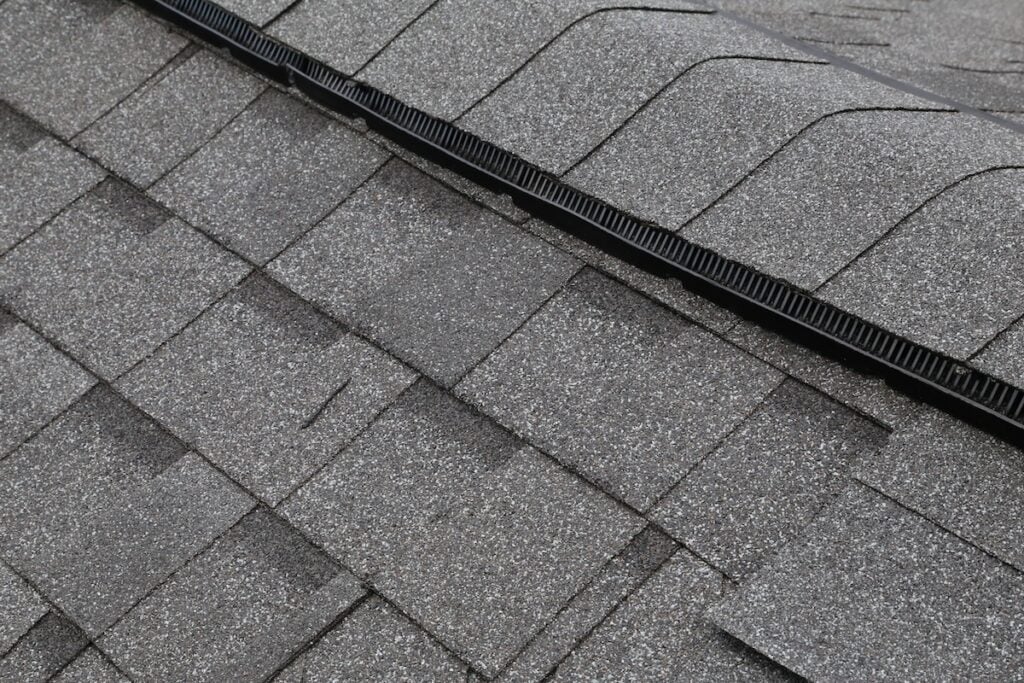
6. Install Ridge Cap Shingles
After the ridge vent is firmly in place, install ridge cap shingles over the top to protect the vent while maintaining airflow. Begin at one end of the ridge and work your way to the other, overlapping each shingle according to the manufacturer’s specifications. Pay close attention to the exposure and nail placement to ensure the shingles are both secure and weather-resistant. Ridge cap shingles not only shield the vent from rain, snow, and debris but also give the roof a finished, polished appearance.
7. Seal the Edges
To further protect against water infiltration, apply a generous bead of roofing cement or sealant along the edges where the ridge vent meets the roof deck. Use a caulking gun for precise application, ensuring that every seam and joint is sealed properly. This step helps create a watertight barrier while still allowing air to flow freely through the vent. Be thorough but careful, as over-sealing can block ventilation. Proper sealing is a key step in ensuring the long-term durability of your ridge vent installation.
8. Final Inspection
Once all the components are installed and sealed, perform a thorough inspection of your work. Check that the ridge vent is properly aligned and securely fastened, with no loose nails or screws. Inspect all seams and edges to confirm they are well-sealed and free of gaps that could let in water. Ensure the ridge cap shingles are evenly spaced and cover the vent entirely. Finally, test the ventilation by observing airflow through the vent if possible. A detailed final inspection ensures that the installation is both effective and built to last.
🛠️ Maintenance and Care
Ridge vents require minimal maintenance, but regular inspections can help ensure they continue working effectively. Here’s what you should do:
Annual Inspections
Performing regular annual inspections of your ridge vent is essential to ensure it continues to function properly. Start by checking for any visible signs of damage, such as cracks, dents, or missing parts. Inspect for debris buildup, including dirt, leaves, or any other materials that might obstruct airflow. Loose or missing fasteners can also compromise the vent’s effectiveness, so make sure to tighten or replace them as needed. Additionally, examine the ridge cap shingles for gaps or wear and tear, and check the sealant for any areas that may need refreshing. If you spot any issues, address them promptly to avoid bigger problems down the line.
Keep It Clean
Keeping your ridge vent clean is crucial for maintaining proper airflow and preventing blockages. Over time, debris such as leaves, branches, dirt, or even bird nests can accumulate around the vent and reduce its effectiveness. Regularly clear away any obstructions using a soft brush to avoid damaging the vent material. For more stubborn dirt or grime, use low-pressure water to gently clean the surface without causing harm. Avoid using high-pressure washers or harsh tools that could dent or crack the vent. A clean ridge vent not only ensures better ventilation but also extends its lifespan and improves your home’s overall ventilation system.
Monitor Performance
The performance of your ridge vent is closely tied to your home’s overall ventilation and comfort. Keep an eye on the temperature and humidity levels in your attic, as these can be key indicators of whether your ridge vent is working as intended. Excessive heat buildup in the attic during warmer months could mean poor ventilation, while moisture issues or condensation in colder months may point to airflow problems or leaks. If you notice these signs, consider consulting a professional to assess whether adjustments, repairs, or even replacements are needed. Monitoring your ridge vent system regularly helps ensure a healthier, more energy-efficient home environment.
👨🔧 Trust Your Ridge Vent Installation to the Experts
At Greentek Roofing & Solar, we understand that your home is one of your most valuable investments, and proper ridge vent installation plays a key role in protecting it. With years of experience, top-quality materials, and a deep understanding of Florida’s unique climate, our team is dedicated to providing solutions that are reliable, efficient, and built to last.
Don’t settle for anything less when it comes to your roofing and ventilation needs. Contact Greentek Roofing & Solar today to schedule your consultation and let us help you safeguard your home with trusted expertise and exceptional service.

Step Into
The Future of Roofing
